It’s been there already for a while. I wonder why I didn’t play with it much sooner, mmm. But then, it is never too late to learn something new.
As Openstack seems to be very complex to set up, Openstack now offers a way to easily build your own lab environment, just for the fun of it. Well, I fired up my Vmware Workstation and gave it try.
This document is basically a translation of a dozen of howto’s I came across and indeed got me a working Openstack instance. The goal is to build a 4 node Openstack test lab and here’s how I did it.
01 – Start
I wanted to build the Openstack test lab using one of my favorite linux distributions Ubuntu. Not wanting to build every single node from scratch, I use the clone feature of my Vmware Workstation after building and setting up the first Ubuntu machine.
After running the initial setup (Minimal Ubuntu) there were a few changes I had to make before I could clone the vm.
First, networking. Make sure you setup a static ip address:
sudo nano /etc/network/interfaces
Adjust your setting accordingly
auto ens33
iface ens33 inet static
    address 10.0.0.120
    netmask 255.255.255.0
    gateway 10.0.0.1
    dns-nameservers 10.0.0.12 10.0.0.1
In this case I’m using 2 nameserver addresses. First my local dns server and a second one which connects to the internet.
Now for some missing packages:
sudo apt-get install git openssh-server
We are going to use git to pull the Openstack packages. All nodes need these, so I’m going to include them before cloning the vm.
Next we are going to setup a Openstack user which gets an entry in the sudoers list without password authentication.
sudo groupadd stack
sudo useradd -g stack -s /bin/bash -d /opt/stack -m stack
You see that the home directory of the user “stack” lies within /opt/stack.
As we don’t want to run the cluster as root but also don’t want to enforce root rights via password authentication we add an entry in the /etc/sudoers file.
sudo nano /etc/sudoers
and add
%stack ALL=(ALL) NOPASSWD: ALL
Basically you now can logout and login as user “stack”, but you can’t login yet as the user doesn’t have a password. So issue:
sudo passwd stack
And set a password.
Now logout and login as user stack for the next step adding ssh keys to connect to the other nodes via,.duh,.ssh.
mkdir ~/.ssh; chmod 700 ~/.ssh
echo "ssh-rsa AAAAB3NzaC1yc2EAAAADAQABAAABAQCyYjfgyPazTvGpd8OaAvtU2utL8W6gWC4JdRS1J95GhNNfQd657yO6s1AH5KYQWktcE6FO/xNUC2reEXSGC7ezy+sGO1kj9Limv5vrvNHvF1+wts0Cmyx61D2nQw35/Qz8BvpdJANL7VwP/cFI/p3yhvx2lsnjFE3hN8xRB2LtLUopUSVdBwACOVUmH2G+2BWMJDjVINd2DPqRIA4Zhy09KJ3O1Joabr0XpQL0yt/I9x8BVHdAx6l9U0tMg9dj5+tAjZvMAFfye3PJcYwwsfJoFxC8w/SLtqlFX7Ehw++8RtvomvuipLdmWCy+T9hIkl+gHYE4cS3OIqXH7f49jdJf jesse@spacey.local" > ~/.ssh/authorized_keys
The last step before I clone the vm is pulling the Openstack packages via git.
git clone https://git.openstack.org/openstack-dev/devstack
cd devstack
As you can see, we haven’t set a hostname yet. We first clone the vm and set the hostnames individually for each node. This is done within a minute. First shutdown your master vm and clone it via Vmware.
02 – The Cluster Controller
We have cloned the master vm to 4 new machine so it is time to set the hostnames and get the ip addresses figured out. My setup uses the following:
| Nodename | Ip | Description |
|---|---|---|
| OS-NODE-01.core.lan | 10.0.0.120 | Cluster Controller |
| OS-NODE-02.core.lan | 10.0.0.121 | Compute Node |
| OS-NODE-03.core.lan | 10.0.0.122 | Compute Node |
| OS-NODE-04.core.lan | 10.0.0.123 | Compute Node |
Now things get interesting. We are almost ready to deploy the Cluster Controller which is the heart of Openstack. But first, let’s set the hostname and adjust the ip addresses accordingly.
OS-NODE-01.core.lan
sudo nano /etc/network/interfaces
auto ens33
iface ens33 inet static
    address 10.0.0.120
    netmask 255.255.255.0
    gateway 10.0.0.1
    dns-nameservers 10.0.0.12 10.0.0.1
sudo nano /etc/hostname
OS-NODE-01.core.lan
sudo nano /etc/hosts
127.0.0.1       localhost OS-NODE-01
127.0.1.1       OS-NODE-01.core.lan
10.0.0.120      OS-NODE-01.core.lan
Okay, we’re almost there. Just before we launch the install we have to make a kind of answering file so we setup the cluster as we want. First touch some files:
pwd
/opt/stack/devstack
touch local.conf
touch stack.sh
Next edit local.conf with:
nano local.conf
Add this:
[[local|localrc]]
HOST_IP=10.0.0.120
FLAT_INTERFACE=ens33
FIXED_RANGE=10.0.0.0/24
FIXED_NETWORK_SIZE=256
FLOATING_RANGE=192.168.1.144/28
MULTI_HOST=1
LOGFILE=/opt/stack/logs/stack.sh.log
ADMIN_PASSWORD=labstack
DATABASE_PASSWORD=supersecret
RABBIT_PASSWORD=supersecret
SERVICE_PASSWORD=supersecret
And:
nano stack.sh
Add:
for i in `seq 2 10`; do /opt/stack/nova/bin/nova-manage fixed reserve 10.0.0.$i; done
Now for the big moment. Be sure you made some coffee as the following process will run for while. In fact, my setup was busy for 45 minutes before it was completed. Issue the following:
cd /opt/stack/devstack
./stack
As I said, the whole process took about 45 minutes to complete. The system is going to pull a lot of dependencies from the internet and installing a lot of new packages. As I used Ubuntu and the cd-rom sources was still active I got a few errors which I corrected by disabling the cdrom source from the apt list.
Adjust the /etc/apt/sources.list:
deb cdrom:[Ubuntu-Server 16.04 LTS _Xenial Xerus_ - Release amd64 (20160420.3)]/ xenial main restricted
and comment this line out:
# deb cdrom:[Ubuntu-Server 16.04 LTS _Xenial Xerus_ - Release amd64 (20160420.3)]/ xenial main restricted
Finally, I got the message the Controller was born;)
=========================
Total runtime         3054

run_process            53
apt-get-update         11
pip_install           972
restart_apache_server  15
wait_for_service       32
git_timed             256
apt-get               429
=========================


This is your host IP address: 10.0.0.120
This is your host IPv6 address: ::1
Horizon is now available at http://10.0.0.120/dashboard
Keystone is serving at http://10.0.0.120:5000/
The default users are: admin and demo
The password: labstack
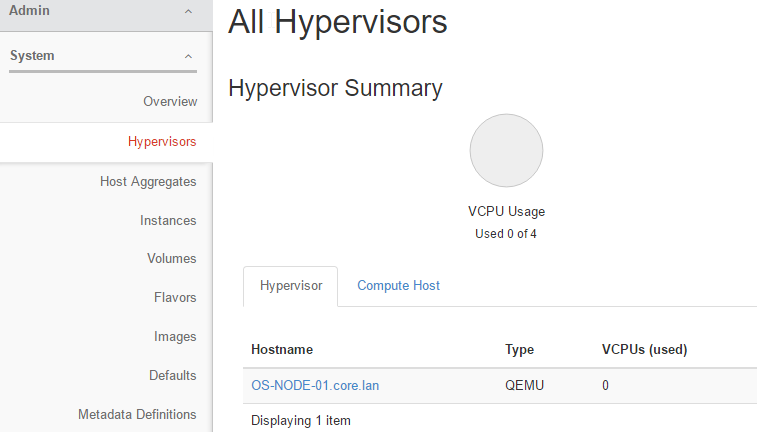
Browsing to http://10.0.0.120/dashboard gave me:
Browsing the admin side gave me a look on the available node:
03 – Computing Nodes
In fact, you are done now. As you can see for yourself, the controller is also a compute node so you can run your instances.
As this is true, it is not enough for me. We didn’t work that hard to just have one compute node, so, lets carry on!
Boot your second node and login as user stack.
Edit the folowing files:
sudo nano /etc/nework/interfaces
Adjust the ip address
auto ens33
iface ens33 inet static
    address 10.0.0.121
    netmask 255.255.255.0
    gateway 10.0.0.1
    dns-nameservers 10.0.0.12 10.0.0.1
Change your hostname for this host:
sudo nano /etc/hostname
Adjust it accordingly:
OS-NODE-02.core.lan
Change your hosts file
sudo nano /etc/hosts
127.0.0.1       localhost OS-NODE-02
127.0.1.1       OS.NODE-02.core.lan
10.0.0.121      OS-NODE-02.core.lan
Reboot the host, reconnect and issue:
cd /opt/stack/devstack
touch local.conf
nano local.conf
And set the following ansible file as:
[[local|localrc]]
HOST_IP=10.0.0.121 # change this per compute node
FLAT_INTERFACE=ens33
FIXED_RANGE=10.0.0.0/24
FIXED_NETWORK_SIZE=4096
FLOATING_RANGE=192.168.1.144/28
MULTI_HOST=1
LOGFILE=/opt/stack/logs/stack.sh.log
ADMIN_PASSWORD=labstack
DATABASE_PASSWORD=supersecret
RABBIT_PASSWORD=supersecret
SERVICE_PASSWORD=supersecret
DATABASE_TYPE=mysql
SERVICE_HOST=10.0.0.120
MYSQL_HOST=$SERVICE_HOST
RABBIT_HOST=$SERVICE_HOST
GLANCE_HOSTPORT=$SERVICE_HOST:9292
ENABLED_SERVICES=n-cpu,n-net,n-api-meta,c-vol
NOVA_VNC_ENABLED=True
NOVNCPROXY_URL="http://$SERVICE_HOST:6080/vnc_auto.html"
VNCSERVER_LISTEN=$HOST_IP
VNCSERVER_PROXYCLIENT_ADDRESS=$VNCSERVER_LISTEN
Make sure you use the right HOST_IP and SERVICE_HOST.
HOST_IP is the ip address of the host, SERVICE_HOST is the controller.
Second big moment now. Installing the compute node! Run:
./stack.sh
Grab a beer and wait until the installation is done. This wil take about 20 minutes in my setup, not so intensive as the controller, but still a long time 🙂
Tadadada tadadadadadadadada, tadadadaaaaaa tadadadaaaaaa tadadadaaaaaa!
Once completed, I got the following message in my console:
=========================
DevStack Component Timing
=========================
Total runtime    1461

run_process       25
apt-get-update    12
pip_install      760
wait_for_service   1
git_timed        122
apt-get          405
=========================


This is your host IP address: 10.0.0.121
This is your host IPv6 address: ::1
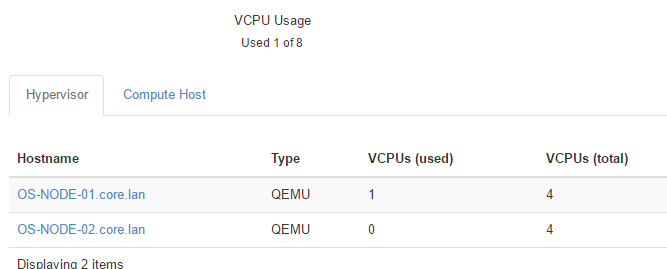
Seems alright to me. Let’s check the web frontend:
Yay!!! Victory!!!
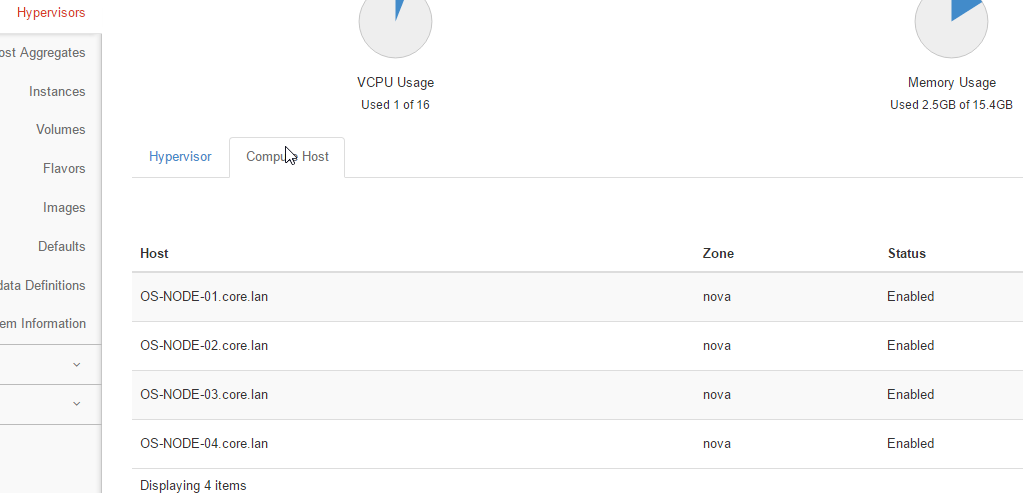
Just add the additional 2 nodes the same way we did the second one. Once you’re done you will have four nodes to play with:
The final result is that you have four nodes to play with. See screenshot below and lets move to part 2. Using Openstack.


Be First to Comment