As there were a few nice “how to’s” found on the internet about setting up Zabbix running on Docker containers within the Synology nas, time will eventually catch up those articles, as it will catch up this article eventually.
This article is just FYI and is based on a mixture of “the monitoring artist” and “Struiners Unie“. I don’t get into the details as my fellow Zabbix enthusiasts did but present you a working system.
First to know is that we are using three separate containers. One for the DB storage, one for the actual DB and one for Zabbix.
Step 1:
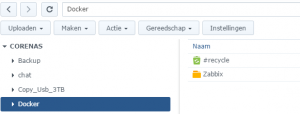
Create a new directory within the shared Docker directory (which is created when installing Docker). I called it Zabbix:)

Step 2:
Create a Docker container with the following command:
docker run -d -v /var/lib/mysql --name zabbix-db-storage busybox:latest
This will create a container which hasn’t a lot of use, but is needed so we can link to actual storage. Create a volume within this container and point it to the newly create directory:

As far as I can see, we just need to start up the container for one time, afterwards we can ignore the container.
Step 3:
Now for a big step, create the Zabbix database:
docker run -d --volumes-from zabbix-db-storage --name zabbix-db -p 63306:3306 --env="MARIADB_USER=zabbix" --env="MARIADB_PASS=STRONGPASS" --env="DB_innodb_buffer_pool_size=768M" monitoringartist/zabbix-db-mariadb:latest
,…and start the container.
Step 4:
Install the Zabbix container with the following command:
docker run -d --name zabbix -p 8080:80 -p 10051:10051 -v /etc/localtime:/etc/localtime:ro --link zabbix-db:zabbix.db --env="PHP_date_timezone=Europe/Amsterdam" --env="ZS_DBHost=zabbix.db" --env="ZS_DBUser=zabbix" --env="ZS_DBPassword=STRONGPASS" monitoringartist/zabbix-xxl:latest
Wait a few (+/- 10 minutes) minutes and the zabbix will be available to you, using Admin as user and zabbix as password.
Enjoy
PS.
I have noticed that browsing my Zabbix webpage, there was a google tracker active which can be disabled within the container environment parameter : XXL_analytics = false. It’s on by default. Just that you know.
Be First to Comment