A few days ago, I saw on Linkedin an announcement of a French company that they would post a demo about monitoring Fail2ban and Iptables with Zabbix. And although I speak some foreign languages, French is not one of them. But, the idea appealed to me as I use a combination of Fail2ban, Iptables and Zabbix at home to protect my home services. There already are templates that monitor Fail2ban instances, but the information you get out of it is rather global. What if I could utilize Iptables as base to get more information about the ip addresses that are really interested in getting into my home network, and maybe display the attackers base on the new Zabbix 6.0 Geomap dashboard widget? That would be cool, wouldn’t it?
Requirements
Before starting let’s summarize what we have, what we want and globally how to get there. First up Fail2ban. Fail2ban is basically not more than a log reader. When it finds an ip address in specific logfiles that tries to violate specific rules it tells Iptables to ban that ip address so it will never be able to connect to my network. Of course this is really simplified, but it’s an article about Zabbix and not Fail2ban.
Next up is Iptables. This is really the workhorse that keeps my network safe. It’s a nifty piece of software that has been around for decades, almost on all Linux distributions it acts as the main firewall solution. We can query Iptables to get all the banned ip addresses. We are going to use these ip addresses as basis for our Zabbix template. But first we have to mold the data in a way Zabbix can understand it. Using a small Shell and Python script we create the data ready for Zabbix to pick up. Futher we’re going to use Crontab to schedule these scripts.
And last, we need an online service from where we get the ip information from. In this case we use ipwho.is to query the ip addresses and get some basic information. We are interested in location and ISP data. We use this data to complement the newly created hosts items.
Let’s put the thoughts in a diagram to visualize the flow.

Simple! Isn’t it? Well let’s start then!
1 – The scripts
This is done on the server which runs the Iptables instance. In fact, all actions are done on this server. We’re going to use the root user as entity that runs both the shell and python script. I can hear you thinking, but only root has the rights to make use of iptables on our system. Of course this will lead to discussions about running services etc under root privileges, but in this case, we just generate two world readable files with only ip addresses, not more.
So, root it is. Just make a directory in /root which will behold the two scripts, in our case /root/f2b. Create two files, get_iptables_data.sh and main.py
root@system:~/f2b# tree
.
├── get_iptables_data.sh
└── main.py
Edit get_iptables_data.sh and add the following line:
#!/bin/bash
/sbin/iptables -L -n | awk '$1=="REJECT" && $4!="0.0.0.0/0"' | awk 'match($0, /[0-9]+\.[0-9]+\.[0-9]+\.[0-9]+/) {i[substr($0,RSTART,RLENGTH)]=1}END{for(ip in i){printf("%s\n", ip)}}' > /tmp/iptables.txt
This will create a list of ip addresses currently blocked by Iptables and a text file containing this list is saved in /tmp as iptables.txt, and only that. The list is \n seperated, but not yet suitable for zabbix to ingest.
root@system:~/f2b# cat /tmp/iptables.txt
192.241.198.8
44.211.98.223
104.152.52.220
3.251.241.167
64.225.48.211
192.241.210.29
...
To transform the above list into usefull JSON, we create a small Python script named main.py with the following content:
import json
result = []
with open('/tmp/iptables.txt') as f:
    lines = f.readlines()
    for line in lines:
        r = line.split('\n')
        result.append({'ip': r[0]})
# print(result)
with open('/tmp/data.json', 'w') as fp:
    json.dump(result, fp)
As you can see we pickup the iptables.txt files, do some reading, and dump it in JSON format within a file (data.json) which also will be found in the /tmp directory. It’s very small and fast and only makes use of the Pythons standard json module (no need to pip things in 😉 ). Output should be like:
root@system:~/f2b# cat /tmp/data.json
[{"ip": "192.241.198.8"}, {"ip": "44.211.98.223"},...
Now we have useful data which we can send into Zabbix, but first let’s create two Cronjobs which will run both scripts. As root user enter crontab -e and add:
0 */6 * * * /root/f2b/get_iptables_data.sh 2>&1
5 */6 * * * /usr/bin/python3 /root/f2b/main.py 2>&1
This means we query Iptables every 6 hours and convert it 5 minutes later. You can play with these values and in this case we get new data 4 times a day.
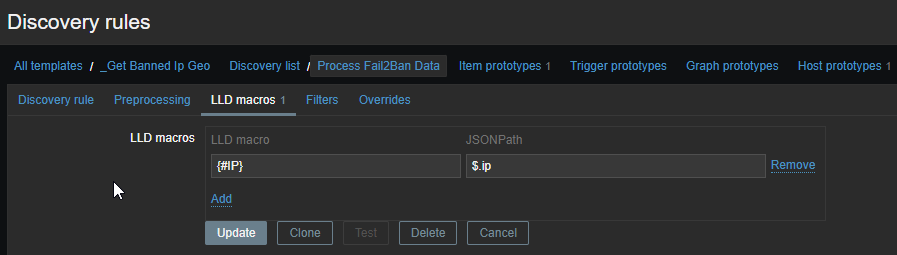
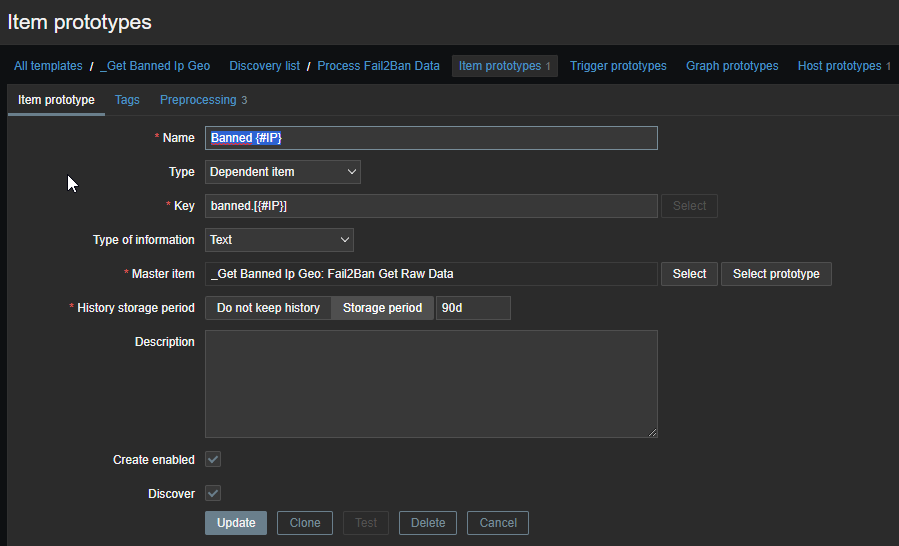
2 – Zabbix Template one
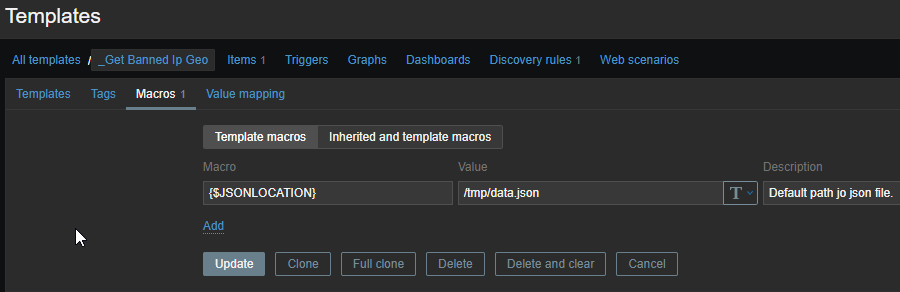
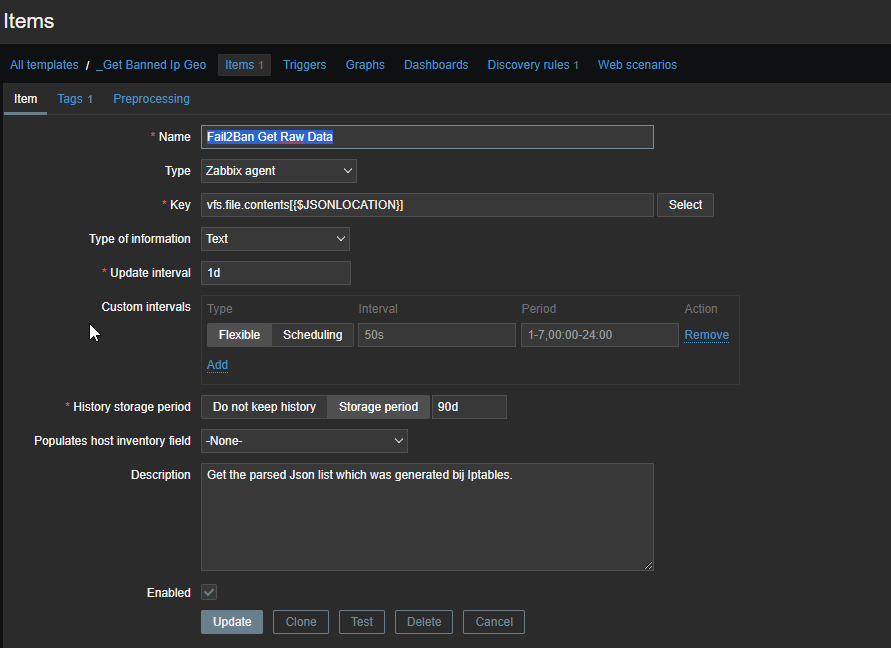
The first template is the only template we directly attach to our Iptables system. It is going to behold 1 item and 1 discovery rule which will create the banned hosts within Zabbix. To be more flexible, we’ve created a single macro which beholds the location of our data.json file, just to be more flexible! Let’s go through the screens:
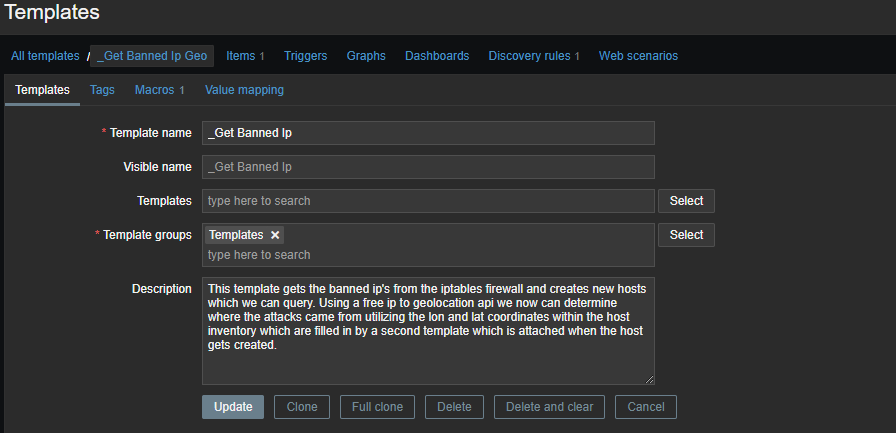


Don’t worry! I will post the templates on my Github page so you only need to download them :).
There is already a lot going on. In short what it does, create an item reading the data from the data.json file, parse it to a discovery rule, create new hosts based on the results. It will take some time to see the logic, but it is there. Trust me.
3 – Zabbix Template two
Now we have data comming in we see new hosts are created within Zabbix.

Is it useful? Not at all. We still don’t know where the ip addresses come from, so let’s create a second template which gets attached automaticly when the LLD creates the new hosts.
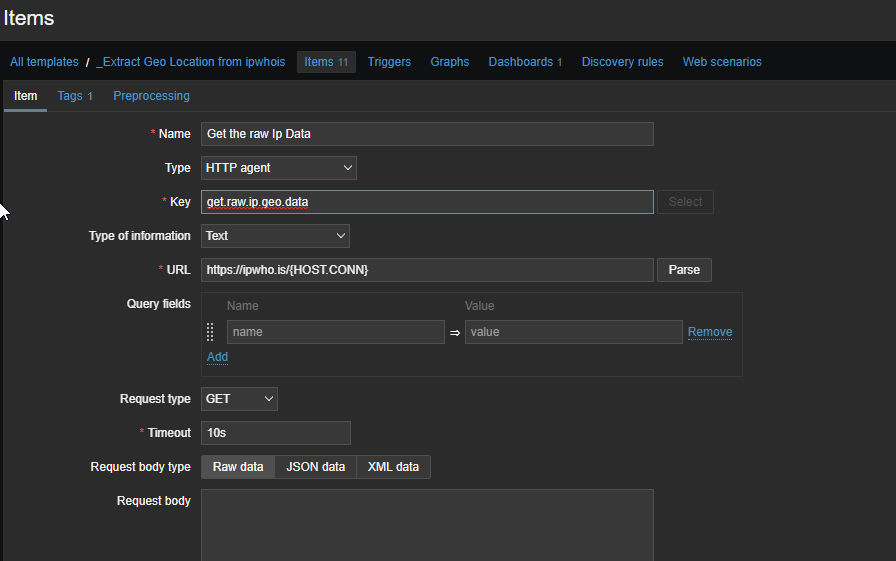
It is a bit odd for our brain to coop with this, because, we attach this template to the discovered host so it it would query our Geo Ip provider, but, it is the Zabbix server who will do all the work using the http agent. This is a crucial mindset step. Anyways,..
Now that our newly created hosts query ip information from our Ip Geo provider, we will create multiple items on the discovered hosts containing interesting information:
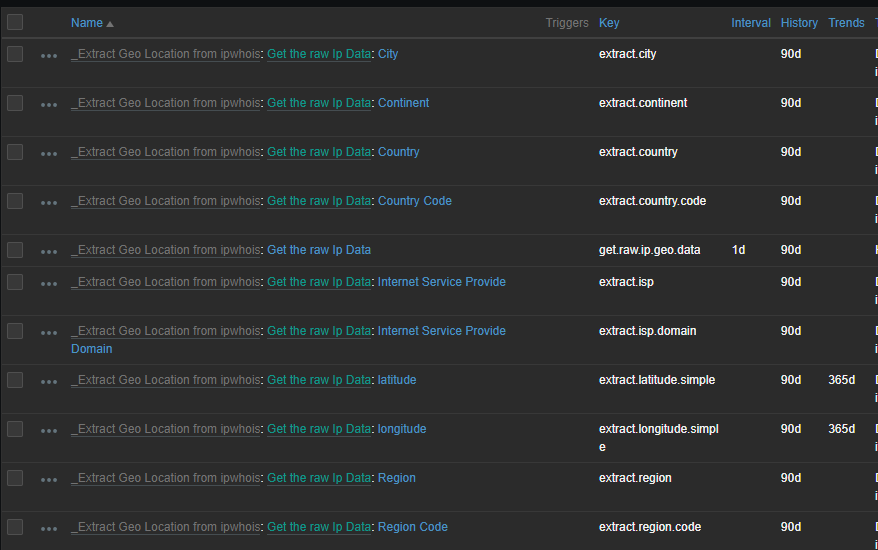
Which will result in:

There is a lot more information available, but we only needed the above. Two items are specially interesting and those are the lat and lon coordinates which are also set within the host inventory so we can use them in Zabbix’s Geomap widget.
Conclusion

So now you have it. It is not about making your home or office infrastructure save, but to get the intel we need so we potentially can create counter measurements….or just for the fun of it :).
PS.
I will publish the scripts and templates a.s.a.p. when they are polished on Github :). Happy Zabbixing!
Is it possible to update the instructions for the step “_Extract Geo Location from ipwhois”
Yeah sure!